Working with Documents
This section describes how to organize submissions, handle unusual file formats, safely research submissions, remove metadata, and mitigate risks from submitted malware.
Tip
This is only a very limited introduction. Freedom of the Press Foundation publishes and maintains digital security guides for journalists, many of which relate to these topics, and offers digital security training for news organization staff.
Organizing submissions
Whenever you download submissions using one of the Download buttons in the Journalist Interface, they will be organized as a ZIP archive with a built-in folder structure, which you can use as a template for organizing submissions on the Secure Viewing Station.
Submissions downloaded in this manner from the list of all sources will contain a structure like the following:
all
├── recessive accreditation
│   ├── 1_2019-07-07
│   │   └── 1-recessive_accreditation-msg.gpg
│   └── 2_2019-07-07
│       └── 2-recessive_accreditation-msg.gpg
└── surviving authentication
    ├── 1_2019-07-07
    │   └── 1-surviving_authentication-doc.gz.gpg
    └── 2_2019-07-07
        └── 2-surviving_authentication-msg.gpg
Submissions downloaded in this manner from the screen for an individual source
will contain a similar structure, but without the parent folder all.
A folder like 1_2019-07-07 in the example above will always contain exactly
one message or document. The numbers in the folder name (1, 2, etc.) correspond
to the numbering in the Journalist Interface. The dates (2019-07-07 in the
example above) are the day (in year/month/day format) of the last activity
related to this source, at the time the archive was downloaded.
If you download messages or documents one at a time in the Journalist
Interface, they will not be contained in a ZIP file at all. Instead, you will
be dealing with individual files like 1-surviving_authentication-doc.gz.gpg,
without a folder structure.
Handling File Formats
SecureDrop accepts submissions of any file type. Tails comes with pre-installed applications for securely working with documents, including an office suite, graphics tools, desktop publishing tools, audio tools, and printing and scanning tools.
For more information, visit the Tails guide to working with sensitive documents.
Pre-Encrypted Submissions
SecureDrop sources can optionally encrypt prior to submitting to SecureDrop. This means that once you decrypt the document as you usually do by double clicking the document in the file manager, there will be another layer of encryption.
Most often, the file will be encrypted to the SecureDrop key. If the file is encrypted to your SecureDrop key, you should be able to double click the file as usual once more in the SVS and it should decrypt.
However, it’s also possible the file is encrypted to another key, potentially
your personal key. If this occurs, you will get an error message in Tails that
reads “Decryption failed. You probably do not have the decryption key”.
To determine which key was used, if you are comfortable at the command line, you
can open the Terminal, navigate to the file, and use:
gpg --decrypt NAME_OF_FILE
replacing NAME_OF_FILE with the name of the file you wish to decrypt. This
command will tell you what key was used to encrypt the file. If you are not
comfortable at the command line, contact your SecureDrop admin or
Freedom of the Press Foundation for assistance.
Warning
Do not transfer source material off the Secure Viewing Station for decryption. Instead, transfer cryptographic keys to the SVS device for decryption and metadata removal.
Researching Submissions
Journalists should take care to research submissions using the Tor Browser, ideally in a new Tails session on your Journalist Workstation for highly sensitive submissions.
Removing Metadata
Tip
For detailed information about removing metadata from documents, check out this in-depth guide to removing metadata.
Tails comes with the Metadata Anonymisation Toolkit 2 (MAT2) that is used to help strip metadata from a variety of types of files, including png, jpg, OpenOffice/LibreOffice documents, Microsoft Office documents, pdf, tar, tar.bz2, tar.gz, zip, mp3, mp2, mp1, mpa, ogg, and flac. We recommend using this and other tools to work with documents within Tails for as much of your workflow as possible.
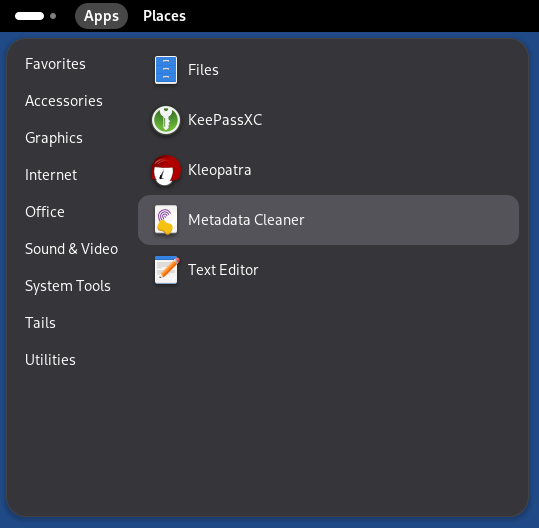
You can use MAT2 via the Metadata Cleaner application which is found in the Accessories section of the Apps menu.
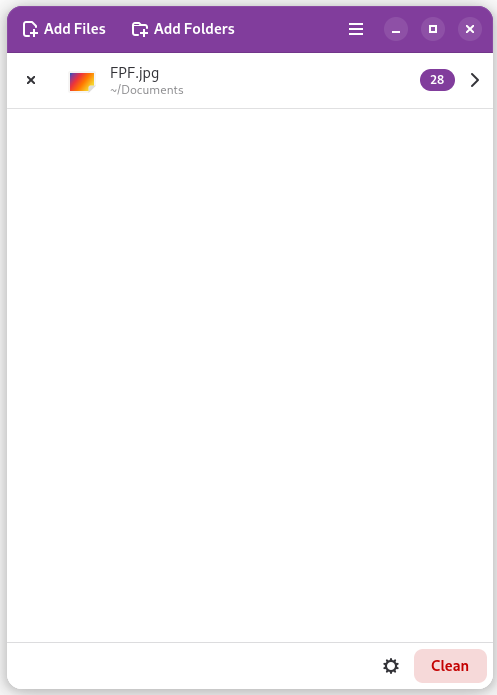
You can load individual files or folders into Metadata Cleaner by clicking Add Files or Add Folders. Metadata Cleaner gives you a count of how many metadata parameters are associated with each file and lets you view the metadata.
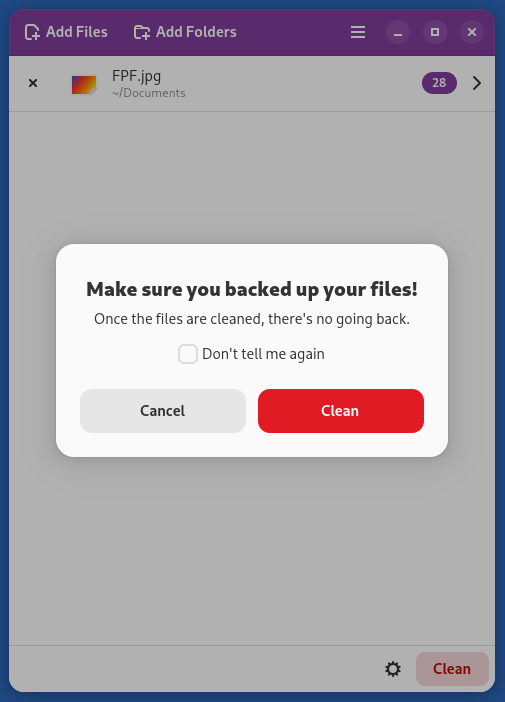
You can select Clean to remove the metadata from the files. Note that this process deletes the original files, leaving only the cleaned versions.
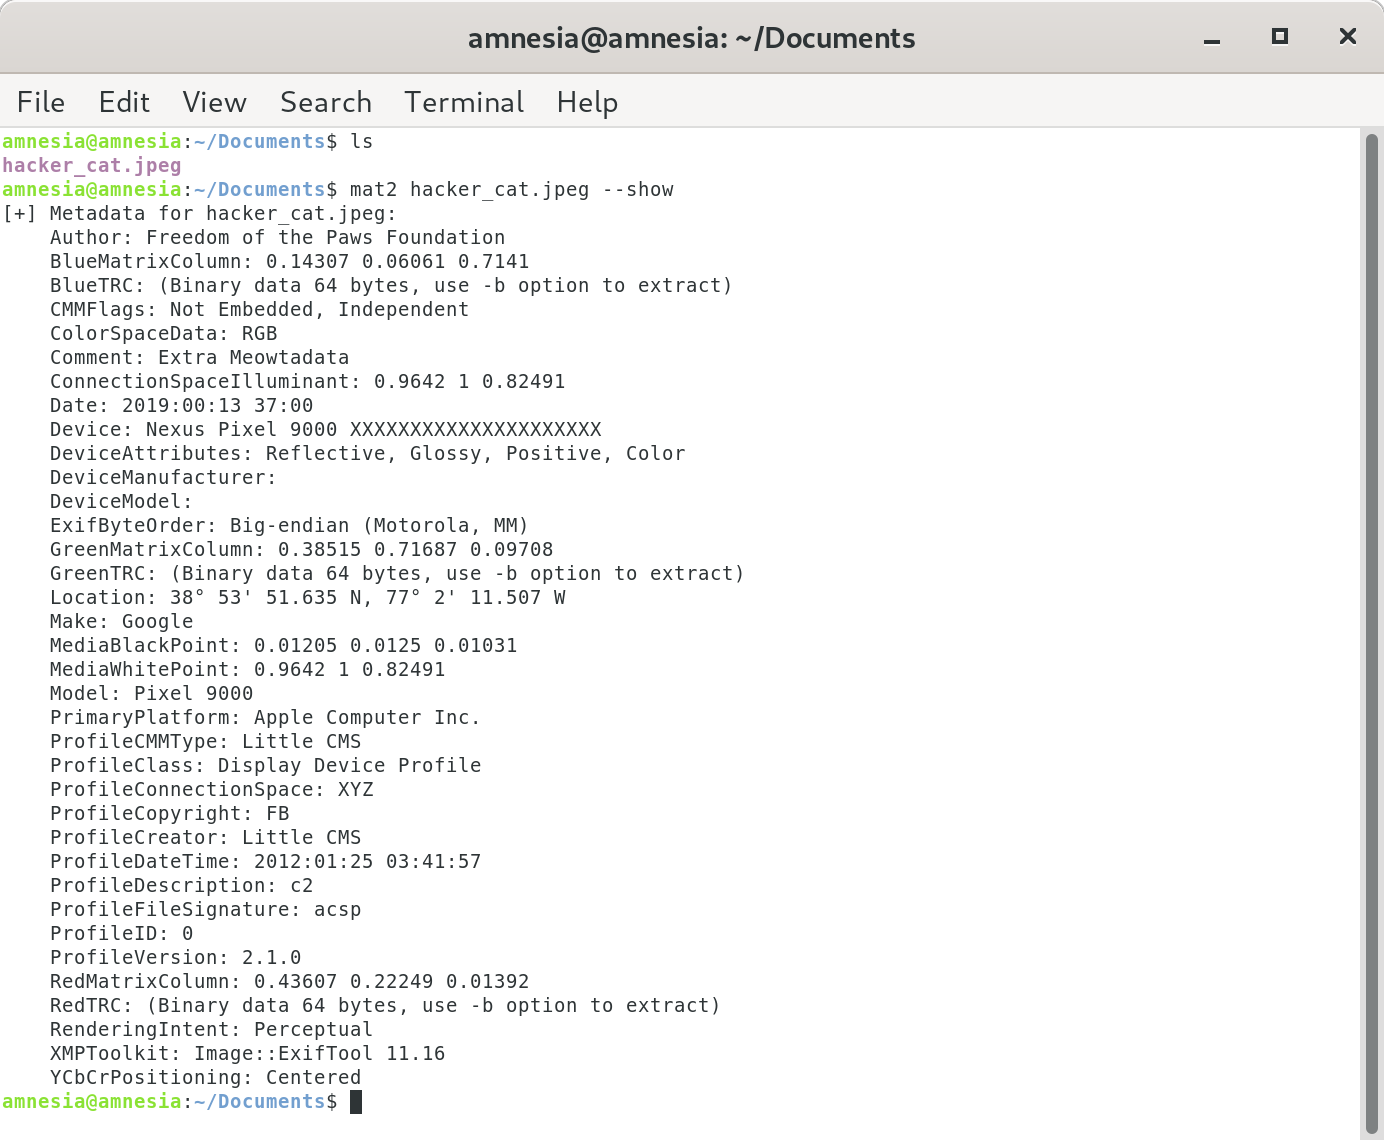
To use MAT2 on the command line, type man mat2 to see a list of available actions you can take with MAT2. For example, you can view the metadata of a file with mat2 filename --show.
You can create a “clean” version of the file with mat2 filename,
noting that this does not erase the metadata on the original file but instead creates a new cleaned copy. Use the --inplace flag if you wish to delete the original file and leave only a cleaned version.
Note that even after running MAT2, you should carefully inspect files to ensure
that all metadata has been wiped, or convert them to a simpler file format (for
example, converting a .xls file to a .csv) to ensure that metadata is
not left behind in error.
Risks From Malware
SecureDrop does not scan for or remove malware in submissions you receive. There are important steps you can take to protect yourself:
Keep the version of Tails on your Secure Viewing Station up-to-date.
Tails offers more protection against compromise than your everyday computer, and the air-gap prevents potential malware from “phoning home.” But if the version of Tails is outdated, an attacker can still attempt to exfiltrate or destroy information.
Print documents from the Secure Viewing Station instead of exporting them digitally, whenever possible.
Printing documents prevents the proliferation of malware to your everyday workstation, and eliminates most categories of embedded metadata. Note that printing a document may still preserve watermarks, printer codes, steganographically encoded data, or other information not visible to the naked eye.
Consult with your administrator or your digital security staff before copying files digitally.
If you must copy a file in digital form (because of its format, the volume of information, or for other reasons), we recommend taking the time to consult with technical experts within the organization.
Tip
Converting files to simpler formats (e.g., PDF to PNG) can help reduce the risk of malware. Tails provides both graphical and command-line utilities that can be used for this purpose.
Never scan QR codes embedded in documents using a network-connected device.
QR codes can contain malicious links that your device will automatically visit. This can alert third-parties to your actions, reveal the identities of your sources, and breach the air gap that is in place with the Secure Viewing Station.
In general, be careful when opening any links provided in a SecureDrop submission. If you are unsure if a link is safe to click, you should consult internally, or contact Freedom of the Press Foundation for assistance.
Don’t photograph submissions using your smartphone, and be careful with all digital photography.
Many smartphones are configured to back up photographs to cloud services, immediately or intermittently; newer digital cameras have similar functionality. Not all backup settings may be visible to you.
Any digital photograph will include certain metadata by default, which may reveal sensitive information about your SecureDrop usage patterns (potentially including GPS coordinates) to anyone who gains access to the file.
Warning
If you have not memorized the passphrases to unlock the USB drives for the Secure Viewing Station or the Transfer Device, you may need to access a password manager on your phone or laptop to do so. We recommend switching any required electronic devices into airplane mode, and securely storing any devices you do not need outside the environment in which you access the Secure Viewing Station. This further mitigates the risk of accidentally compromising the air-gap.
Fully mitigating the risks of malware received via SecureDrop is beyond the scope of this documentation. If you have questions, you can contact us at securedrop@freedom.press (GPG encrypted) or via the support portal. Please do NOT disclose details about the contents of any submission you have received.
Moving Documents to Your Everyday Workstation
Important
As noted above, SecureDrop does not scan for or remove malware. If the file you received contains malware targeting the operating system and applications running on your everyday workstation, copying it in its original form carries the risk of spreading malware to that computer. Make sure you understand the risks, and consider other methods to export the document (e.g., print).
If you must copy a file from your Secure Viewing Station to your everyday workstation in digital form, our recommendation is that journalists are provided with an Export Device, typically a USB drive, which is encrypted using VeraCrypt. These instructions assume that you are following the recommended workflow. If you are unsure, ask your administrator.
Note
VeraCrypt support was added to Tails in version 3.9. We strongly recommend keeping your Secure Viewing Station up-to-date with each release of Tails.
To open the Export Device on the Secure Viewing Station, follow these steps:
If your Export Device has a physical write protection switch, make sure it is in the unlocked position.
Plug the Export Device into the Secure Viewing Station.
Enter your passphrase, which we recommend keeping in your own personal password manager (e.g., on your smartphone), not on KeePassXC.
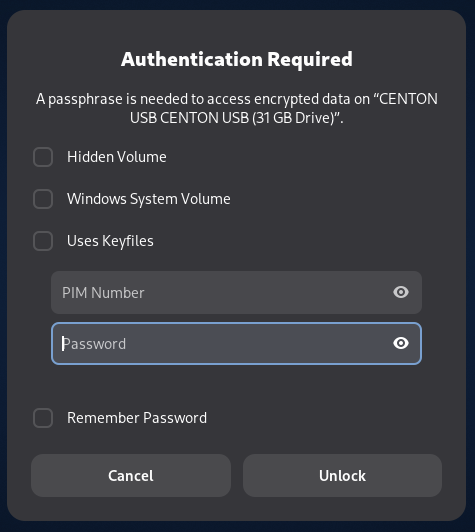
Click Unlock.
The Export Device should now open in the file manager. If there are still files on the Export Device from your last copy operation, delete them by moving them to the Trash, and then selecting Empty Trash.
Copy the file or files you want to access on your everyday workstation to the Export Device using the file manager.
Decrypting and Preparing to Publish
Note
To decrypt a VeraCrypt drive on a Windows or Mac workstation, you need to have the VeraCrypt software installed. If you are unsure if you have the software installed or how to use it, ask your administrator, or see the Freedom of the Press Foundation guide for working with VeraCrypt.
To access the Export Device on your everyday workstation, follow these steps:
If your Export Device has a physical write protection switch, make sure it is in the locked position.
Plug the Export Device into your everyday workstation.
Launch the VeraCrypt application.
Click Select Device and select the Export Device, then click OK.
Click Mount.
Enter the passphrase for your Export Device. You should find this in your own personal password manager.
Open the Export Device in your operating system’s file manager, and copy the contents of interest to your everyday workstation.
As a security precaution, we recommend deleting the files on the Export Device after each copy operation. If you are using write protection, you have to perform this step on the Secure Viewing Station to get the security benefits of write protection.
When you are done, switch back to the VeraCrypt window, and click Dismount.
You are now ready to write articles and blog posts, edit video and audio, and begin publishing important, high-impact work!
Tip
Check out our SecureDrop Promotion Guide to read about encouraging sources to use SecureDrop.
Deleting submissions and source accounts
As part of routine SecureDrop usage, we recommend that you establish data retention practices consistent with your organization’s threat model, data lifecycle and data retention policies. Regularly deleting submissions and source accounts can mitigate risks in the event that your SecureDrop servers or a source’s account details are compromised.
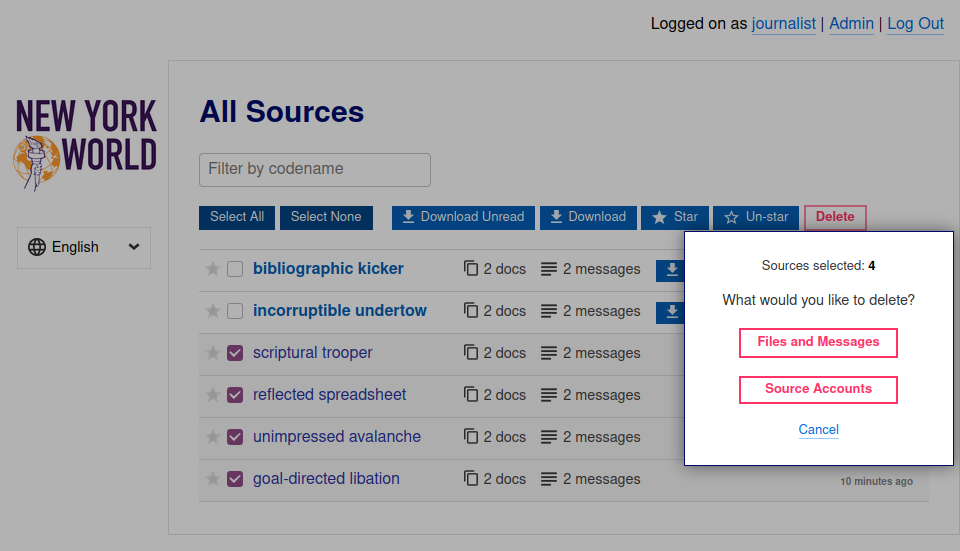
To delete sources, first select them in the list of all sources in the Journalist Interface, then click the Delete button. You will be given a choice to delete all messages and files for the selected sources, or to delete the source accounts.
If you delete messages and files for a source, the source will continue to appear in the list of sources in the Journalist Interface, and they will still be able to log into the Source Interface using their codename. Consider using this option as part of regular deletion of reviewed submissions, especially if you are not sure that all communication with the source has concluded.
Note
If you delete all messages and files, that includes all replies you have sent to the source, even if the source has not seen them yet. You will still be able to send new replies.
If you delete the entire source account, the source will not be able to log in again using their codename, and all information about them will be destroyed. Consider using this option if it is clear that all communication with the source has concluded, or if the source has requested that all information about them and their submissions should be removed.
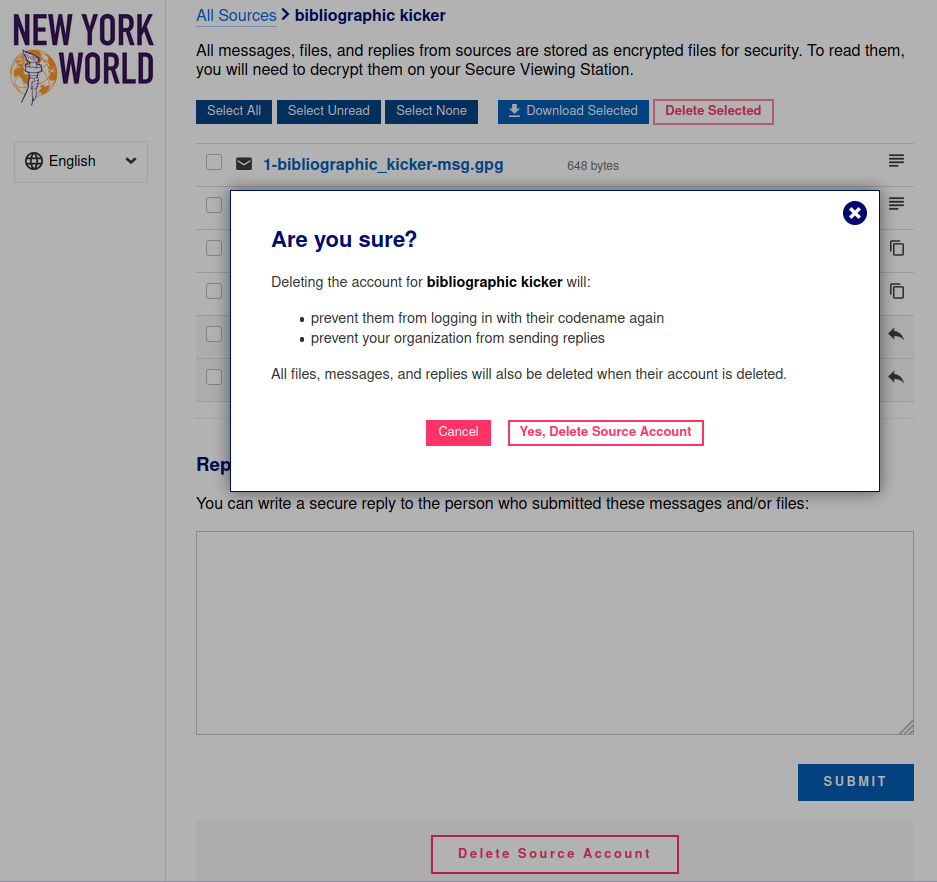
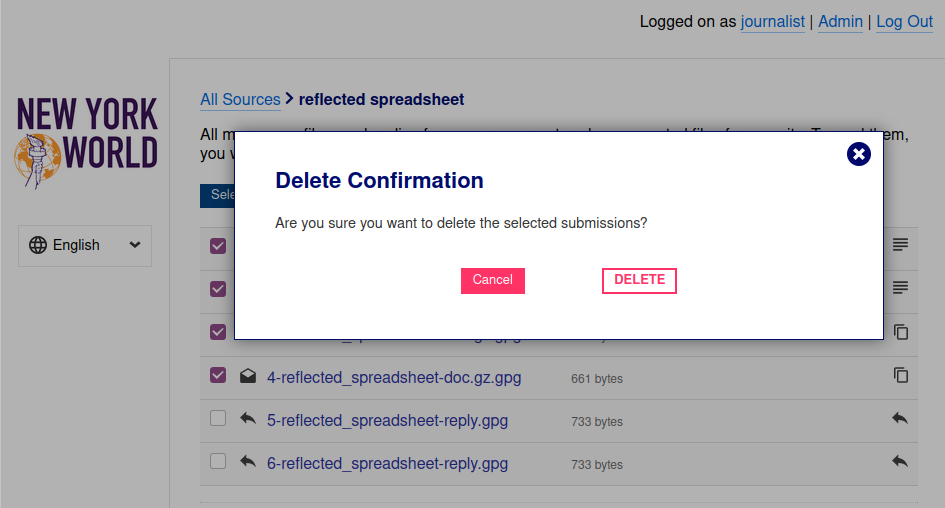
You can more selectively delete source submissions and journalist replies by
clicking the source’s two-word designation in the list of all sources. You will
see a list of source messages (filenames end with -msg.gpg), file submissions
(filenames end with -doc.gz.gpg) and journalist replies (filenames end with
--reply.gpg).
Select the source data you wish to delete, then click the Delete button. You will be prompted for confirmation.
From the same page, you also have the option to delete the entire source account. To do so, click the button labeled Delete Source Account at the bottom of the page. You will be prompted for confirmation.