Set Up the Admin Workstation
Earlier, you should have created the Admin Workstation Tails USB along with a persistent volume for it. Now, we are going to add a couple more features to the Admin Workstation to facilitate SecureDrop’s setup.
If you have not switched to and booted the Admin Workstation Tails USB on your regular workstation, do so now.
Start Tails with Persistence Enabled
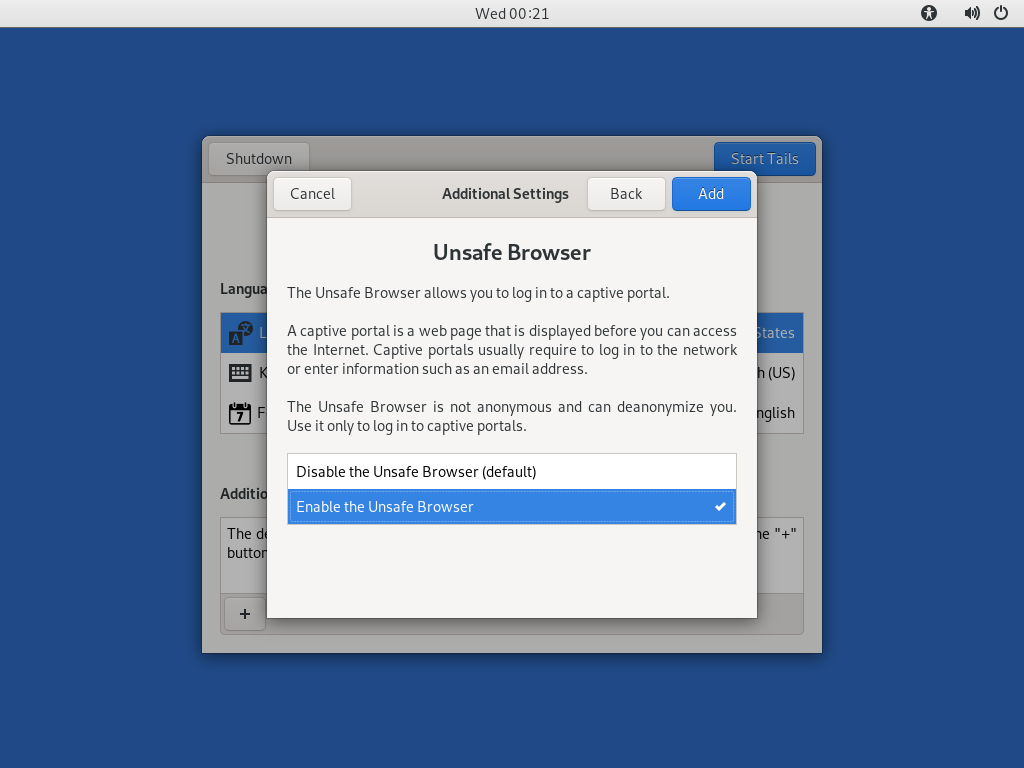
After you boot the Admin Workstation Tails USB on your normal workstation, you should see a “Welcome to Tails” screen with a field labeled “Encrypted Persistent Storage”. Enter your password and click Unlock. Do not click Start Tails yet. Under “Additional Settings” click +.
Click Administration password, enter a password for use with this specific Tails session, and click Add.
Note
The Tails administration password is a one-time password. It will reset every time you shut down Tails.
During the installation, you will need the unsafe browser to access the firewall configuration. If you are using Tails 5.8 or newer, the unsafe browser is enabled automatically. If you are using an earlier version, you can enable it by clicking “Unsafe Browser” and then clicking Add:
Click Start Tails. After Tails finishes booting, make sure you’re connected
to the Internet  and that the Tor status onion icon is not crossed out
 , consulting the icons in the upper right corner of the
screen.
, consulting the icons in the upper right corner of the
screen.
Download the SecureDrop Repository
The rest of the SecureDrop-specific configuration is assisted by files
stored in the SecureDrop Git repository. We’re going to be using this
again once SecureDrop is installed, but you should download it now. To
get started, open a terminal  . You will use this Terminal
throughout the rest of the install process.
. You will use this Terminal
throughout the rest of the install process.
Start by running the following commands to download the git repository.
cd ~/
git clone https://github.com/freedomofpress/securedrop.git
Note
Since the repository is fairly large and Tor can be slow, this may take a few minutes.
Caution
Do not download SecureDrop Git repository as a Zip file, or any other means. Only download by using the given git command.
Verify the Release Tag
Important
It is crucial for the integrity of your installation that you carefully follow the instructions below. By following these steps, you will verify if your copy of the codebase has been approved by the SecureDrop development team.
Download and verify the SecureDrop Release Signing Key using the following command:
gpg --keyserver hkps://keys.openpgp.org --recv-key \
"2359 E653 8C06 13E6 5295 5E6C 188E DD3B 7B22 E6A3"
If you are not copy-pasting this command, we recommend you double-check you have entered it correctly before pressing enter. GPG will implicitly verify that the fingerprint of the key received matches the argument passed.
If GPG warns you that the fingerprint of the key received does not match the one requested, do not proceed with the installation. If this happens, please contact us at securedrop@freedom.press.
Note
If the --recv-key command fails, first double-check that
Tails is connected to Tor. Once you’ve confirmed that you’re successfully
connected to Tor, try re-running the --recv-key command a few times.
If the command still fails, the keys.openpgp.org keyserver may be down. In that case, we recommend downloading the key from the SecureDrop website:
cd ~/
torify curl -LO https://securedrop.org/securedrop-release-key.asc
Before importing it, inspect the key’s fingerprint using the following
command. The --dry-run option ensures that the key is not imported just
yet:
gpg --with-fingerprint --import-options import-show --dry-run \
  --import securedrop-release-key.asc
Compare the fingerprint in the output with the fingerprint at the beginning of this section. If the fingerprints match, you can safely import the key, using the following command:
gpg --import securedrop-release-key.asc
If you encounter any difficulties verifying the integrity of the release key, do not proceed with the installation. Instead, please contact us at securedrop@freedom.press.
Once you have imported the release key, verify that the current release tag was signed with the release signing key:
cd ~/securedrop/
git fetch --tags
git tag -v 2.15.1
The output should include the following two lines:
gpg:                using RSA key 2359E6538C0613E652955E6C188EDD3B7B22E6A3
gpg: Good signature from "SecureDrop Release Signing Key <securedrop-release-key-2021@freedom.press>" [unknown]
Important
If you do not see the message above, signature verification has failed and you should not proceed with the installation. If this happens, please contact us at securedrop@freedom.press.
Verify that each character of the fingerprint matches what is on the screen of your workstation. If it does, you can check out the new release:
git checkout 2.15.1
Important
If you see the warning refname '2.15.1' is ambiguous in the
output, we recommend that you contact us immediately at
securedrop@freedom.press (GPG encrypted).
Copy the Admin Password Database Template
We provide a KeePassXC password database template you can later use to store credentials related to your SecureDrop. For now, copy the template to the Persistent folder using ths following command:
cp ~/securedrop/keepassxc/securedrop-keepassx.kdbx \
   ~/Persistent/Passwords.kdbx
Install SecureDrop Package and Dependencies
A SecureDrop Admin Workstation must have the securedrop-admin package and dependencies installed before installing the servers. To install these packages, from the base of
the SecureDrop repository that you cloned previously (~/securedrop/), run the following
command:
sudo apt update
./securedrop-admin tails-bootstrap
The package installation will take approximately 10 minutes or longer, depending on network speed and computing power. Once the installation is complete, you will be prompted to reboot the workstation. Please do so.
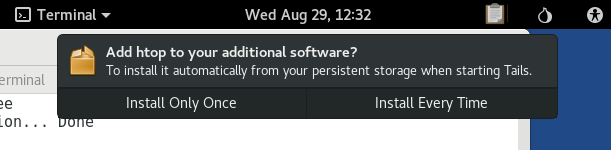
Note
The apt persistence feature will prompt to install the package automatically from persistent storage on each boot. Click Install Every Time:
Note
Occasionally this command times out due to network latency issues. You should be able to re-run the command and complete the setup.
Important
The tails-bootstrap command should only be run as the amnesia user,
not as root. Contact the SecureDrop team if the package
installation encounters repeated errors.