Troubleshooting kernel updates
Kernel updates address known bugs and security vulnerabilities in the Linux kernel. They may be installed automatically on your Application and Monitor Servers as part of a SecureDrop release. All kernel updates are tested extensively against recommended hardware. If things do go wrong (e.g., the server does not boot after a kernel update), the following instructions will help you to roll back to the previous, working kernel. You can then report compatibility issues to us so we can work together to resolve them as quickly as possible.
First, you need to physically access each server. Power down the server (safely if possible), attach required peripherals (keyboard, monitor), and power the server back up.
If you have access to the password for your admin user, you can use it to log into each server without the use of two-factor authentication, which was disabled for keyboard logins in SecureDrop 0.8.0. You may have saved the password in the KeePassXC database on your Admin Workstation. If you do not have the password, you can boot into single user mode instead.
Boot into single user mode
To access single user mode, you will have to edit the boot options for the new kernel. You can do so using the GRUB bootloader, pictured below:
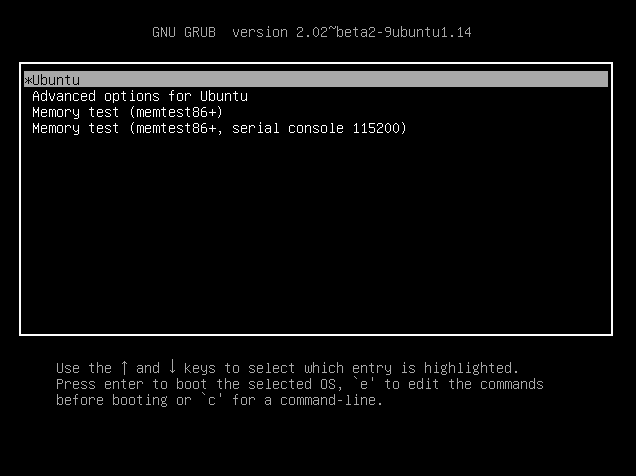
Press any key quickly just once. You will only have about 2 to 3 seconds before Ubuntu starts booting. If you miss that window, just log in normally and reboot safely, provided you can log in. Do not unplug or forcibly shut down the server.
Once you hit a key, you will be able to interact with the menu with the up (⬆) and down (⬇) keys. Select “Ubuntu” as shown above, and press “e” to edit the boot options. In the line that begins with “linux”, add the word “single” at the end. When you are done, the output on your console should look similar to the screenshot below.
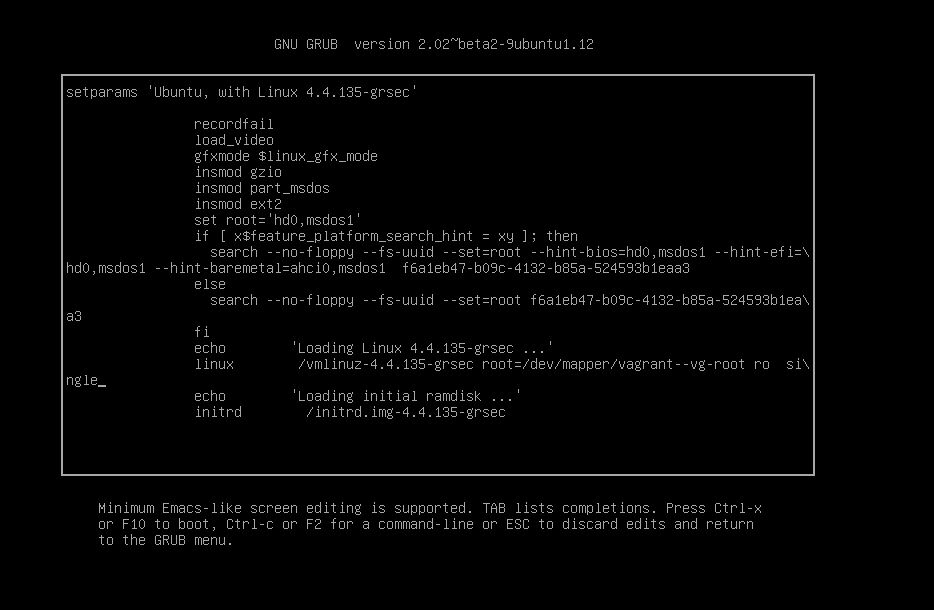
Press the “F10” key to boot.
Test the new kernel
Observe the boot process. It is possible that the system will fail to boot completely; if so, the log information will help us to understand what is happening.
Provided that you can log in, check if you have network access. Try a
command such as sudo host freedom.press. If you don’t have network
access, it is most likely due to the upgraded kernel missing a network
driver for your hardware.
If everything appears to be operating normally, the outage may not be kernel-related. In that case, you may still wish to follow the steps at the end of this document to send us log information along with an issue report, and we will help you investigate.
If you are experiencing network issues or other kernel problems, we recommend that you roll back to an older kernel, and that you report the issue to us immediately.
Compare the behavior of the old kernel
Reboot the server in a safe way with sudo reboot. After the BIOS screen,
you can select a different kernel from the GRUB boot menu by selecting
Advanced options for Ubuntu, pictured below.

The next menu should give you a list of kernels, similar to the one pictured below:
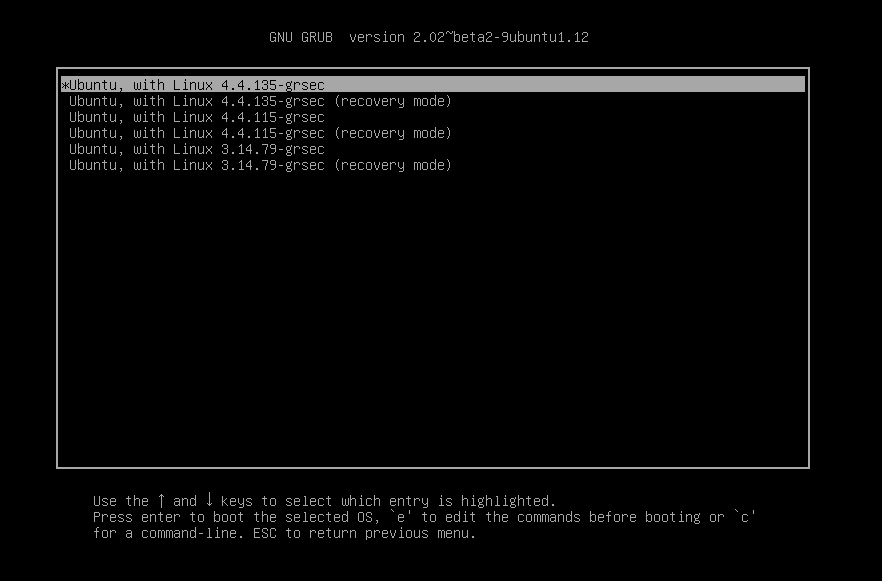
Choose the option with the previous kernel version. If unsure, please consult the release notes for the most recent release of SecureDrop, which will include details about kernel version changes.
As before, you may need to edit the kernel options to enter single user mode. The boot process should proceed normally. Wait until you get a login prompt and log in.
Once you are logged in, check to see if you have network access. If you do, then your instance is having an issue with the newer kernel. In that case, we need to temporarily set an older kernel as the default.
Roll back to the old kernel
Important
It is of critical importance for the security of your instance that we work together to resolve any compatibility issues. Rolling back to an older version is only a stopgap measure to avoid a prolonged outage of your SecureDrop instance.
Inspect the file /boot/grub/grub.cfg. You should find a menuentry line
with the same text that you selected during boot, e.g.:
submenu 'Advanced options for Ubuntu'…

  menuentry 'Ubuntu, with Linux 4.xxx.xx-grsec…
Take note of its position among the other submenu entries (it will most likely be third). Then edit the GRUB configuration:
sudo nano /etc/default/grub
Make a backup of the file or take a note of the current value of
GRUB_DEFAULT somewhere, so you can restore the previous behavior easily at a
later point.
Once you have done so, set the GRUB_DEFAULT variable to point to the index
of the menu and submenu. Note that the index starts at 0, so for a typical
setup, the line in /etc/default/grub would look like this:
GRUB_DEFAULT="1>2"
The “1” means the second entry of the main menu (“Advanced options”), the “2” means the third entry of the submenu. Again, update these numbers consistent with your configuration.
Caution
Ensure that you have chosen the right index for the main menu and the submenu, and double-check that you are beginning the count at 0, not 1; otherwise, you may boot into the wrong kernel.
This change still has to be applied to take effect on the next boot:
sudo update-grub
Now you can reboot into the old, working kernel.
sudo reboot
The server should come up automatically. From here on, you should be
able to perform all administrative tasks via SSH as usual. If you want
additional confirmation of the kernel version, the command
uname -r should display the expected kernel version number.
Please notify us of the compatibility issue so we can help you resolve it ASAP.
Report compatibility issues
If you have encountered issues with a kernel update, it is important that you report them to us so that we may incorporate any necessary changes to our updated kernel, and so that we can work with you to switch back to the new kernel as soon as possible.
Run the following commands via SSH from the Admin Workstation:
source /usr/share/securedrop-admin/venv/bin/activate
cd /usr/share/securedrop-admin/ansible-base
ansible all -b -m setup > ~/server-facts.log
Please also send us a copy of /var/log/syslog and /var/log/dmesg for
analysis.
You can share server-facts.log, syslog and dmesg with us as follows:
If you are a member of our Support Portal, please create a new issue and attach the files to it.
Alternatively, email us at securedrop@freedom.press (GPG encrypted) with the subject “SecureDrop kernel facts” and the files attached.
Once we get your information, we can try to provide assistance to resolve compatibility issues.
Test and enable an updated kernel
If you have changed your default kernel, we urge you to test an updated kernel as soon as it becomes available in a future SecureDrop release. Note that an update may be enforced as part of a release to protect the security of your instance. Please consult the release notes for details about kernel updates.
You can test a kernel update without downtime for your instance by booting your
Monitor Server with the new kernel. Log into your Monitor Server using
the Admin Workstation. Shut down the server safely using the command
sudo poweroff. Ensure that the server is fully powered off.
Attach required peripherals and power the server back up. After the GRUB bootloader appears, select Advanced options for Ubuntu, pictured below.
If a SecureDrop release with a kernel update has been installed on your system, the updated kernel version will be available in the list of options:
Select the new kernel (you do not need to use the version with recovery mode). If you do not know your admin account password, you can boot into single user mode by editing the boot options. Otherwise, press enter to boot.
Verify that you can boot successfully, and that you have network access
(sudo host freedom.press). If you still encounter problems with the new
kernel, please report compatibility issues at your earliest convenience, and
reboot the server into the old kernel for now.
If the update resolved compatibility issues with an earlier kernel version, you
can make the new kernel the default. Edit the file /etc/default/grub, e.g.,
by issuing the following command:
sudo nano /etc/default/grub
Make a backup of the file or take a note of the current value of
GRUB_DEFAULT somewhere, so you can restore the previous behavior if needed.
Change the line to GRUB_DEFAULT=0. This configures the bootloader to default
to loading the most recent kernel version installed on your server.
This change still has to be applied to take effect on the next boot:
sudo update-grub
Safely shut down the Monitor Server, remove attached peripherals, and reboot
it. Verify that it is working correctly by logging in using your Admin
Workstation. If everything is working as expected, you can make the same change
to /etc/default/grub on your Application Server as well. Remember to again
run the command sudo update-grub when you are done.
You can make the change on the Application Server from your Admin Workstation
and reboot the server using the command sudo reboot.
Subsequent kernel updates will again be applied automatically.