Create USB Boot Drives
Overview
For the initial SecureDrop setup, you will need three USB drives.
Two of them will be used for the Tails operating system, for creating the Admin Workstation and Secure Viewing Station.
The other USB drive will have the Ubuntu Server installer, which is needed to install the underlying server OS for your Application and Monitor Servers.
Important
As soon as you create a new drive, be sure to label it immediately. USB drives all look alike and you’re going to be juggling a whole bunch of them throughout this installation. Label immediately. Always.
Tails Introduction
Tails is a privacy-enhancing live operating system that runs on removable media, such as a DVD or a USB stick. It sends all your Internet traffic through Tor, does not touch your computer’s hard drive, and securely wipes unsaved work on shutdown.
Most of the work of installing, administering, and using SecureDrop is done from computers using Tails, so the first thing you need to do is set up several USB drives with the Tails operating system. To get started, you’ll need two Tails drives: one for the Admin Workstation and one for the Secure Viewing Station. Later, you’ll set up a bunch more Tails drives for your journalists and backups, but for now you just need two.
Install Tails
The Tails website has detailed and up-to-date instructions on how to download and verify Tails, and how to create a bootable Tails USB drive.
Follow the instructions at these links and then return to this page:
Important
Make sure you verify the Tails .img file using one of the methods described on the Tails website.
You will need to create 2 Tails USBs to perform the SecureDrop installation:
The Secure Viewing Station Tails USB.
The Admin Workstation Tails USB.
Tip
This process will take some time, most of which will be spent waiting around.
Enable Persistent Storage
By default, everything you save while running Tails will be securely erased and discarded when you power off or reboot your system.
Because we will need to keep certain settings and files saved between sessions, you will need to enable persistence.
Creating an encrypted persistent volume will allow you to securely save information and settings in the free space that is left on your Tails drive. You will need to create a persistent storage on each Tails drive. Each drive’s persistent storage partition needs its own unique, complex passphrase that’s easy to write down or remember.
For instructions on how to generate a strong passphrase, see the Passphrases page.
Please use the instructions on the Tails website to make the persistent volume on each Tails drive you create. When creating the persistence volume, you will be asked to select from a list of features, such as ‘Personal Data’. You should enable all features by selecting each item in the list.
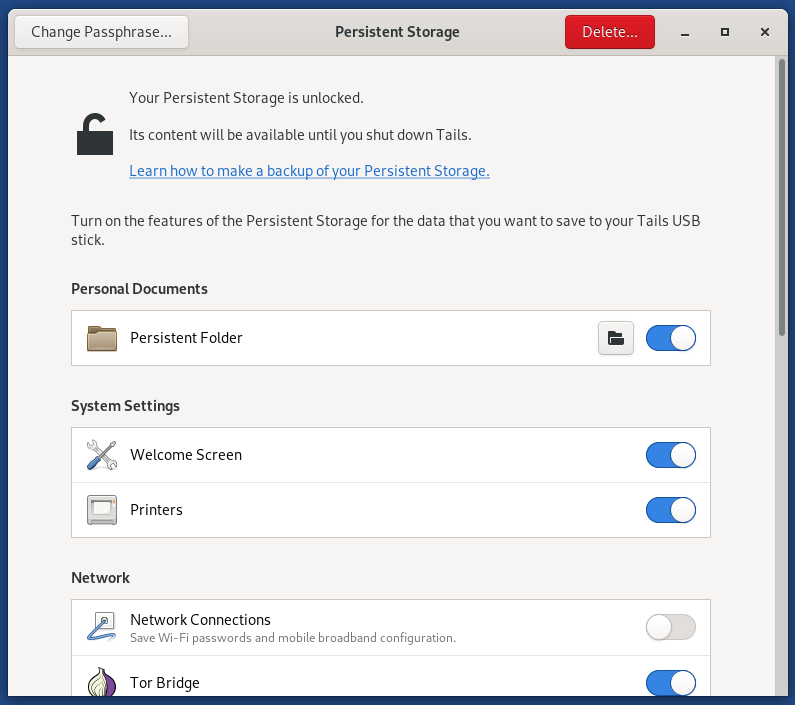
Beginning with Tails 5.8, a Persistent Storage application is provided which will allow you to enable or disable features without requiring a restart. You can also use this tool to change the passphrase of the persistent volume (provided you still know the original passphrase).
Some other things to keep in mind:
Right now, you need to create a persistent volume on both the Admin Workstation Tails drive and the Secure Viewing Station Tails drive.
Each journalist will need their own Tails drive with their own persistent volume secured with their own passphrase — but that comes later.
Note
Tails doesn’t always completely shut down and reboot properly when you click “restart”, so if you notice a significant delay, you may have to manually power off and restart your computer for it to work properly.
Warning
Make sure that you never use the Secure Viewing Station Tails drive on a computer connected to the Internet or a local network. This Tails drive will only be used on the air-gapped Secure Viewing Station.
Ubuntu Introduction
Note
Installing Ubuntu is simple and may even be something you are very familiar with, but it is strongly encouraged that you read and follow this documentation exactly as there are some “gotchas” that may cause your SecureDrop setup to break.
The SecureDrop Application Server and Monitor Server run Ubuntu Server 24.04.4 LTS (Noble Numbat). To install Ubuntu on the servers, you must first download and verify the Ubuntu installation media.
Download the Ubuntu Installation Media
The installation media and the files required to verify it are available on the Ubuntu Releases page. You will need to download the following files:
Alternatively, you can use the command line:
cd ~/Downloads
curl -OOO https://releases.ubuntu.com/24.04.4/{ubuntu-24.04.4-live-server-amd64.iso,SHA256SUMS{,.gpg}}
Verify the Ubuntu Installation Media
You should verify the Ubuntu image you downloaded hasn’t been modified by a malicious attacker or otherwise corrupted. To do so, check its integrity with cryptographic signatures and hashes.
First, download both Ubuntu Image Signing Keys and verify their fingerprints.
gpg --recv-key --keyserver hkps://keyserver.ubuntu.com \
"C598 6B4F 1257 FFA8 6632 CBA7 4618 1433 FBB7 5451" \
"8439 38DF 228D 22F7 B374 2BC0 D94A A3F0 EFE2 1092"
Note
It is important you type this out correctly. If you are not copy-pasting this command, double-check you have entered it correctly before pressing enter.
Again, when passing the full public key fingerprint to the --recv-key command, GPG
will implicitly verify that the fingerprint of the key received matches the
argument passed.
Caution
If GPG warns you that the fingerprint of the key received does not match the one requested do not proceed with the installation. If this happens, please email us at securedrop@freedom.press.
Next, verify the SHA256SUMS file.
gpg --keyid-format long --verify SHA256SUMS.gpg SHA256SUMS
Move on to the next step if you see “Good Signature” in the output, as below. Note that any other message (such as “Can’t check signature: no public key”) means that you are not ready to proceed.
gpg: Signature made Thu 11 Feb 2021 02:07:58 PM EST
gpg:                using RSA key 843938DF228D22F7B3742BC0D94AA3F0EFE21092
gpg: Good signature from "Ubuntu CD Image Automatic Signing Key (2012) <cdimage@ubuntu.com>" [unknown]
gpg: WARNING: This key is not certified with a trusted signature!
gpg:          There is no indication that the signature belongs to the owner.
Primary key fingerprint: 8439 38DF 228D 22F7 B374  2BC0 D94A A3F0 EFE2 1092
The next and final step is to verify the Ubuntu image.
sha256sum -c <(grep ubuntu-24.04.4-live-server-amd64.iso SHA256SUMS)
If the final verification step is successful, you should see the following output in your terminal.
ubuntu-24.04.4-live-server-amd64.iso: OK
Caution
If you do not see the line above it is not safe to proceed with the installation. If this happens, please contact us at securedrop@freedom.press.
Create the Ubuntu Installation Media
The Ubuntu website has detailed instructions on how to to create a bootable Ubuntu Server USB drive.
Follow the instructions at the link below for your operating system, then return to this page: