
Exporting and printing#
In addition to providing a secure environment to view messages and files, SecureDrop Inbox presents several options to print or export:
Printing#
To print from SecureDrop Inbox, a compatible printer must be plugged into the computer’s USB port.
Printing documents#
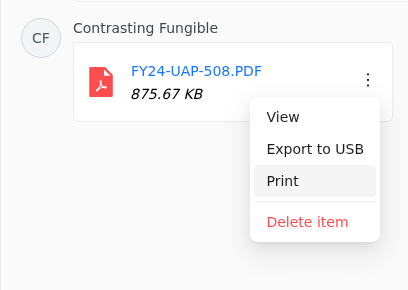
After downloading the document in the conversation view, click the three dots menu and select Print.
Wait for
sd-devicesto start.You will prompted to attach your printer.
A Print Document dialog will appear, from which you can configure different print options before printing the document.
Printing conversation transcripts#
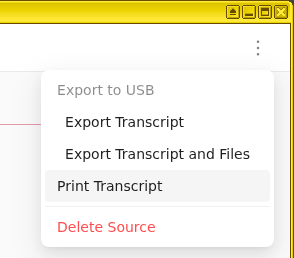
From the three dots conversation menu, select Print Transcript.
Wait for
sd-devicesto start.You will prompted to attach your printer.
A Print Document dialog will appear, from which you can configure different print options before printing the document.
Exporting using an Export Device#
Important
SecureDrop does not scan for or remove malware. If the file you received contains malware targeting the operating system and applications running on your everyday workstation, copying it in its original form carries the risk of spreading malware to that computer. Make sure you understand the risks, and consider other methods to export the file (e.g., printing documents).
If you must copy a file from your SecureDrop Workstation to another computer or device in digital form, we recommend using an Export Device, a USB flash drive which is encrypted using LUKS or VeraCrypt. These instructions assume that you are following the recommended workflow. If you are unsure, ask your Administrator.
Note
Files submitted by a Source must first be downloaded before they can be exported.
Attach an Export Device#
Before exporting any files or transcripts, you should first attach and unlock your Export Device.
Insert the Export Device and wait for
sd-devicesto start.If your Export Device is using VeraCrypt, you will need to unlock it manually:
Open the file menu by clicking on the Qubes Application menu
 (in the top left), select sd-devices and click Files.
In the left sidebar, click the entry labeled # GB Possibly Encrypted.
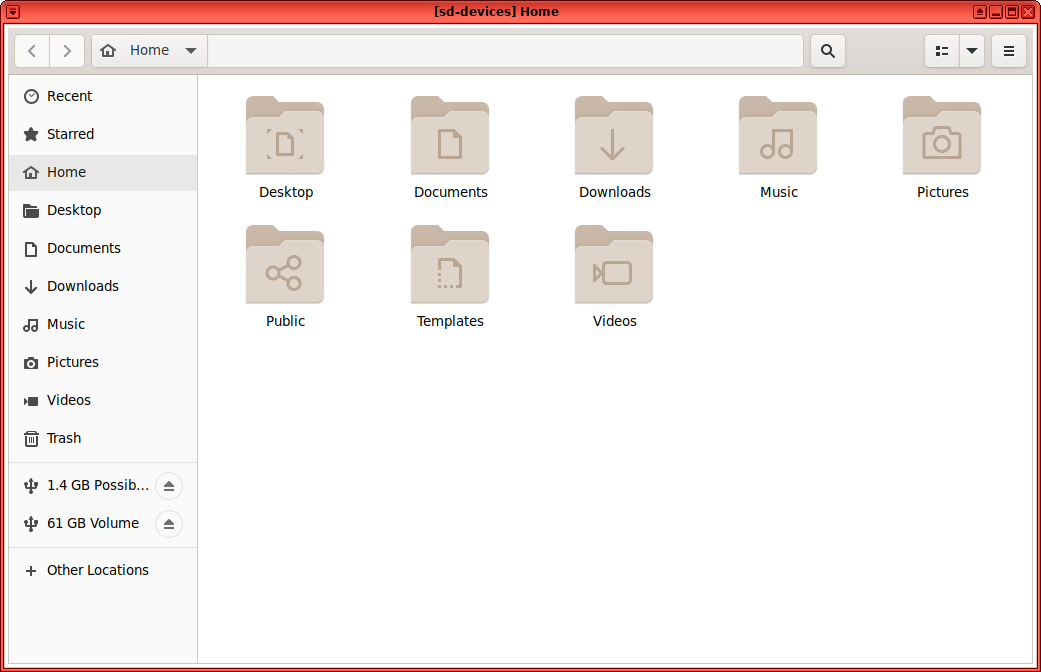
You will be prompted for the password configured for this Export Device:
Volume type: leave both unchecked
PIM: leave empty
Password: drive’s password
Forget password immediately: selected
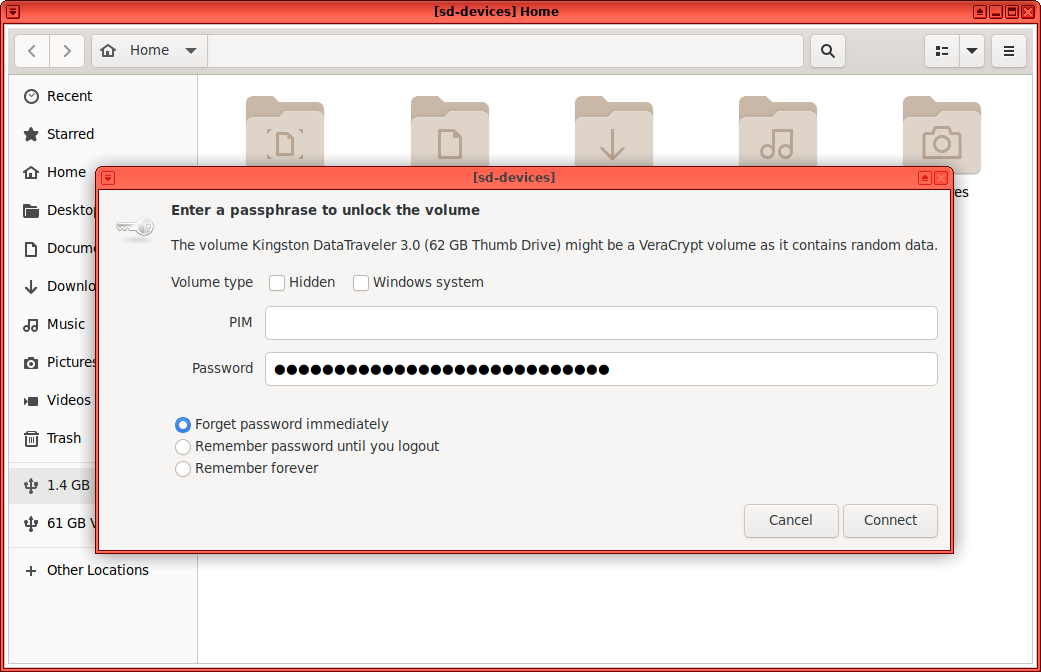
Click Connect.
Exporting individual files#
Open the three dots menu of the file you which to export and click Export to USB.
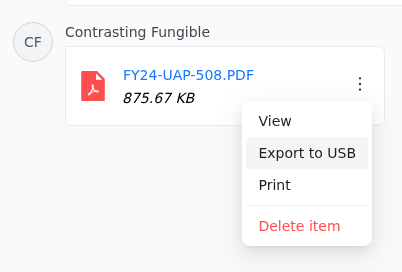
If you have not already unlocked your Export Device, you will be prompted for the password configured for this Export Device.
Once you see a message informing you that the export was successfully completed, you can safely unplug the Export Device. Alternatively, you can leave the drive plugged in and export additional files or transcripts.
Exporting conversation transcript#
SecureDrop Inbox will generate a .txt file transcript of your entire conversation with a Source. Previously deleted messages will not appear in this transcript.
From the three dots conversation menu, select Export Transcript.
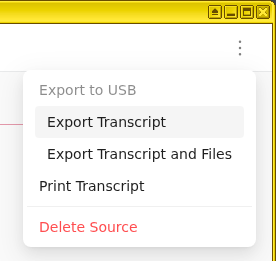
If you have not already unlocked your Export Device, you will be prompted for the password configured for this Export Device.
Once you see a message informing you that the export was successfully completed, you can safely unplug the Export Device. Alternatively, you can leave the drive plugged in and export additional files or transcripts.
Exporting transcript and files#
You may also export the transcript and all downloaded files for a Source in one action.
From the three dots conversation menu, select Export Transcript and Files.
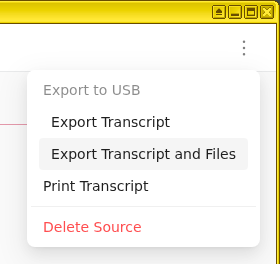
If you have not already unlocked your Export Device, you will be prompted for the password configured for this Export Device.
Once you see a message informing you that the export was successfully completed, you can safely unplug the Export Device. Alternatively, you can leave the drive plugged in and export additional files or transcripts.
Decrypting and preparing to publish#
Note
To decrypt a VeraCrypt drive on a Windows or Mac workstation, you need to have the VeraCrypt software installed. If you are unsure if you have the software installed or how to use it, ask your Administrator, or see the Freedom of the Press Foundation guide for working with VeraCrypt.
To access the Export Device on your everyday workstation, follow these steps:
If your Export Device has a physical write protection switch, make sure it is in the locked position.
Plug the Export Device into your everyday workstation.
Launch the VeraCrypt application.
Click Select Device and select the Export Device, then click OK.
Click Mount.
Enter the passphrase for your Export Device. You should find this in your own personal password manager.
Open the Export Device in your operating system’s file manager, and copy the contents of interest to your everyday workstation.
When you are done, switch back to the VeraCrypt window, and click Dismount.
You are now ready to write articles and blog posts, edit video and audio, and begin publishing important, high-impact work!
Tip
Check out our SecureDrop Promotion Guide to read about encouraging sources to use SecureDrop.
Securely erase an Export Device#
Due to the underlying technology of USB flash drives, Export Devices are likely to retain recoverable portions of files that have been stored on them even if those files have been deleted.
To protect against the possibility that a compromised encryption password will yield access to traces of previously exported files, you should securely erase your Export Devices on a regular basis. You may also wish to do this on a case-by-case basis after handling particularly sensitive files or if you believe a decryption password may be compromised.
Securely erasing an Export Device can only be done by re-formatting and re-encrypting the USB flash drive with a new encryption password. You can follow the same steps used to initially create the Export Device, or contact your Administrator.
You may also choose to destroy the drives by physical means, such as using a hammer or purpose-built shredder to pulverize the drive.